How Can You Use Probiotics to Make Yoghurt: Steps and Considerations
How Can You Use Probiotics to Make Yoghurt: Steps and Considerations
Making your own yoghurt at home is not only economical but also allows you to control exactly what goes into your food. The process revolves around beneficial bacteria—probiotics—that transform ordinary milk into a creamy, tangy treat packed with health benefits. Whether you're looking to improve your gut health or simply enjoy fresher dairy products, homemade yoghurt offers a satisfying way to incorporate more probiotics into your diet. This guide will walk you through everything you need to know about using probiotics to create delicious, nutritious yoghurt in your own kitchen.
Essential Bacterial Strains for Yoghurt
Key Bacteria for Fermentation
The magic of yoghurt-making happens through bacterial fermentation, with two primary strains doing most of the heavy lifting: Lactobacillus bulgaricus and Streptococcus thermophilus. These powerhouse bacteria work synergistically to convert lactose (milk sugar) into lactic acid, which both preserves the milk and creates yoghurt's characteristic tangy flavor. The acidification process also causes milk proteins to coagulate, giving yoghurt its thick, creamy texture.
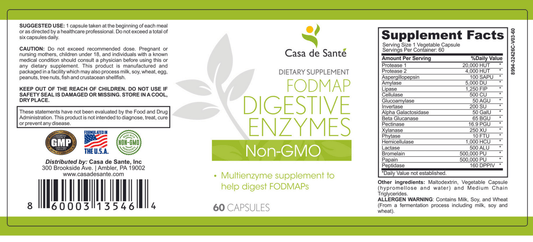
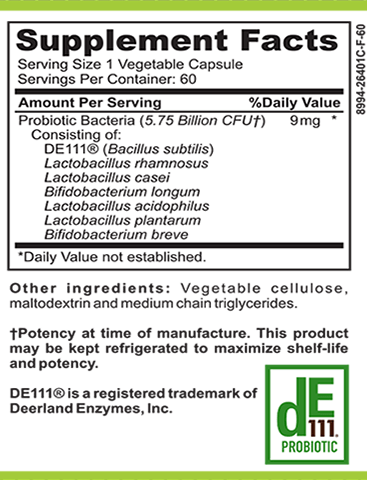
Beyond these traditional cultures, many yoghurt makers incorporate additional probiotic strains such as Lactobacillus acidophilus, Bifidobacterium species, and Lactobacillus casei. These supplementary bacteria aren't essential for the yoghurt-making process itself but can significantly enhance the health benefits of your final product, supporting digestive health in ways similar to specialized digestive enzyme supplements.
Characteristics of Effective Cultures
Effective yoghurt cultures share several important characteristics that ensure successful fermentation. First, they must be active and viable—meaning they're alive and ready to multiply when introduced to milk. Quality cultures will rapidly acidify milk, reaching a pH of around 4.5 within 4-6 hours at the proper temperature (typically 110-115°F or 43-46°C).
The best cultures also produce consistent results with predictable flavor profiles and textures. They should be resilient enough to withstand minor fluctuations in temperature and other environmental factors. Many experienced yoghurt makers look for cultures that can be propagated through successive batches, allowing you to use a portion of your previous yoghurt to start your next batch—a process known as "back-slopping" that can continue for many generations before the culture needs refreshing.
Selecting the Ideal Starter Culture
Types of Starter Cultures Available
When beginning your yoghurt-making journey, you'll encounter several forms of starter cultures. Freeze-dried powders are perhaps the most common commercial option, offering convenience and long shelf life. These powders contain dormant bacteria that activate when mixed with milk at the appropriate temperature. They're ideal for beginners due to their consistency and ease of use.
Alternatively, you can use existing live yoghurt as your starter. Simply reserve a few tablespoons from a previous batch or purchase plain, unsweetened yoghurt with live active cultures. This method is economical but requires careful selection of the source yoghurt to ensure it contains the desired bacterial strains. Some specialty suppliers also offer liquid starter cultures, which can be particularly potent but typically have shorter shelf lives than freeze-dried options.
Factors to Consider When Choosing
Several considerations should guide your selection of a yoghurt starter culture. First, consider your dietary preferences and restrictions. If you're following specific diets like keto or paleo, look for cultures that align with these needs, similar to how you might select digestive enzymes for particular dietary requirements. Some cultures are specifically formulated to work with non-dairy milks for those avoiding animal products.
The flavor profile you desire also matters significantly. Different bacterial combinations produce varying levels of tanginess and texture. Some cultures create mild, creamy yoghurt, while others develop stronger, more acidic flavors. Temperature tolerance is another crucial factor—some cultures perform well at room temperature, making them ideal for yoghurt makers without specialized equipment, while others require precise temperature control for optimal results.
Finally, consider whether you want a single-use starter or one that can be propagated through multiple batches. Heirloom or reusable cultures may cost more initially but offer long-term value as they can be used repeatedly when properly maintained.
Probiotic Methods for Yoghurt Production
Step 1: Preparing the Milk
The foundation of good yoghurt begins with properly prepared milk. Start with fresh, high-quality milk—whole, low-fat, or skim all work, though the fat content will affect the richness of your final product. For the creamiest results, whole milk is ideal. Before introducing any cultures, the milk must be heated to at least 180°F (82°C) and held there for about 10 minutes. This pasteurization step denatures the milk proteins, particularly whey proteins, allowing them to contribute to a thicker texture.
After heating, cool the milk to the appropriate inoculation temperature, typically between 110-115°F (43-46°C). This temperature range is crucial—too hot, and you'll kill your probiotic cultures; too cool, and they won't activate properly. Using a reliable thermometer is essential for this step. Some yoghurt makers add milk powder at this stage to increase protein content and create an even thicker consistency, though this is optional.
Step 2: Ensuring Cleanliness
Cleanliness is paramount in yoghurt making, as unwanted bacteria can compete with your carefully selected probiotics and ruin your batch. Before beginning, thoroughly wash all equipment with hot, soapy water and rinse well. Many experienced yoghurt makers take the additional step of sanitizing their containers and utensils with boiling water or a food-grade sanitizing solution.
Work in a clean environment and minimize exposure to air during the fermentation process. Cross-contamination can occur easily, so keep your yoghurt-making area separate from other food preparation. Remember that the goal is to create an environment where your chosen probiotic cultures can thrive without competition from unwanted microorganisms.
Step 3: Inoculation and Incubation
Once your milk has reached the proper temperature, it's time to introduce your starter culture. If using freeze-dried powder, follow the package instructions for the appropriate amount—typically one packet per quart of milk. If using existing yoghurt as starter, add about 2-3 tablespoons per quart. Gently but thoroughly whisk the culture into the milk to ensure even distribution of the bacteria.
Transfer the inoculated milk to your incubation container and maintain a consistent temperature during fermentation. This can be accomplished using a yoghurt maker, Instant Pot, oven with the light on, or even a well-insulated container like a thermos. The incubation period typically ranges from 4-12 hours depending on your culture and desired tanginess—longer fermentation produces more acidic yoghurt. Avoid disturbing the yoghurt during this critical period, as movement can disrupt the developing protein structure.
Step 4: Finalizing Your Yoghurt
When your yoghurt has reached your preferred level of fermentation, refrigerate it promptly to slow bacterial activity. Cooling also firms the texture further. For Greek-style yoghurt, strain the finished product through cheesecloth or a coffee filter to remove whey and create an even thicker consistency. This straining process increases protein concentration while reducing lactose content.
Before serving, you may wish to stir your yoghurt if you prefer a smooth texture, or leave it undisturbed for a more set-style product. Homemade yoghurt can be flavored after fermentation with fruit, honey, vanilla, or other additions of your choice. Store in clean, sealed containers in the refrigerator, where it will typically keep for 1-2 weeks, continuing to develop slightly more tanginess over time.
Nutritional Benefits of Homemade Yoghurt
Probiotics and Digestive Health
Homemade yoghurt delivers an impressive array of live probiotics that support digestive health in ways similar to specialized digestive enzyme supplements. These beneficial bacteria help maintain the balance of your gut microbiome, potentially improving digestion and nutrient absorption. Regular consumption of probiotic-rich yoghurt has been associated with reduced symptoms of irritable bowel syndrome, decreased incidence of antibiotic-associated diarrhea, and improved lactose digestion even in individuals with lactose intolerance.
The probiotic benefits extend beyond digestion, with research suggesting connections to enhanced immune function, improved mental health, and even potential weight management benefits. Homemade yoghurt typically contains higher counts of live bacteria than many commercial varieties, particularly those that have undergone extensive processing or contain preservatives that may inhibit bacterial viability.
Nutrient Retention in Homemade Yoghurt
Beyond probiotics, homemade yoghurt retains an impressive nutritional profile. It provides complete protein containing all essential amino acids, making it particularly valuable for vegetarian diets. The fermentation process actually increases the bioavailability of certain nutrients, including B vitamins and minerals like calcium, phosphorus, and zinc.
Homemade yoghurt also avoids the added sugars, artificial sweeteners, stabilizers, and preservatives common in many commercial products. This allows you to control exactly what goes into your yoghurt while maximizing its nutritional value. The fermentation process pre-digests some of the lactose in milk, potentially making homemade yoghurt easier to tolerate for those with mild lactose sensitivity.
Overcoming Common Yoghurt-Making Challenges
Troubleshooting Texture Issues
Texture problems are among the most common challenges in homemade yoghurt production. If your yoghurt turns out too thin or runny, several factors might be responsible. Insufficient heating of the milk before culturing prevents proper protein denaturation, while inadequate incubation temperature can slow bacterial activity. Using ultra-pasteurized milk can also result in weaker texture, as can disturbing the yoghurt during fermentation.
Conversely, excessively thick or grainy yoghurt might result from overheating the milk, using too much starter culture, or fermenting for too long. Adding a stabilizer like gelatin or using milk with higher protein content can help achieve your desired consistency. Remember that homemade yoghurt naturally separates some whey—this is normal and can either be stirred back in or drained off depending on your preference.
Addressing Flavor Problems
Flavor issues typically stem from either the fermentation process or the quality of ingredients. Excessively sour yoghurt usually indicates over-fermentation—simply reduce your incubation time in future batches. Bitter or "off" flavors might signal contamination with unwanted bacteria, emphasizing the importance of cleanliness throughout the process.
If your yoghurt lacks flavor depth, consider experimenting with different starter cultures or extending fermentation slightly. The quality of milk significantly impacts flavor—fresher milk from grass-fed animals often produces more complex, satisfying yoghurt. For those who find plain yoghurt too tangy, adding a small amount of sweetener or fruit during serving (not during fermentation) can balance the acidity while preserving probiotic benefits.
Best Practices for Successful Yoghurt Making
Storage and Shelf Life Tips
Proper storage significantly extends the quality and safety of homemade yoghurt. Always refrigerate promptly after fermentation reaches your desired level, using clean containers with tight-fitting lids to prevent contamination. Glass containers are ideal as they don't absorb odors or leach chemicals. Store yoghurt away from strongly aromatic foods in the refrigerator, as dairy readily absorbs surrounding odors.
Homemade yoghurt typically remains at peak quality for about 7-10 days, though it often stays safe to consume for up to two weeks. As it ages, it will continue to acidify slightly and may release more whey. If you've made a large batch, consider freezing portions for later use—while freezing does reduce some probiotic viability, many beneficial bacteria will survive. Frozen yoghurt works particularly well in smoothies or baked goods.
Experimenting with Flavors and Additives
Once you've mastered basic yoghurt production, the possibilities for customization are endless. Add flavors after fermentation is complete to avoid interfering with the culturing process. Fresh or frozen fruits, honey, maple syrup, vanilla extract, and spices like cinnamon or cardamom all pair beautifully with yoghurt's tangy base. For a protein boost, stir in a small amount of nut butter or hemp seeds.
Creating yoghurt parfaits with layers of granola, fruit, and honey makes for an appealing breakfast or snack. Savory applications are equally delicious—try using plain yoghurt as a base for herb-infused dips, marinades, or as a cooling accompaniment to spicy dishes. As you become more comfortable with the process, you might even experiment with different milk types, including goat, sheep, or plant-based alternatives, each offering unique flavors and nutritional profiles.

