How to Make Sauerkraut at Home Easy: A Physician's Guide to Gut Health


How to Make Sauerkraut at Home Easy: A Physician's Guide to Fermentation
In my practice as a physician-scientist, I often discuss the profound impact of the gut microbiome on systemic health. While modern medicine offers incredible tools, sometimes the most potent interventions are found in the ancient art of fermentation. Sauerkraut, a simple preparation of fermented cabbage, is a nutritional powerhouse teeming with beneficial probiotics. Many of my patients are intimidated by the idea of fermenting food at home, fearing it is complex or unsafe. However, learning how to make sauerkraut at home easy is one of the most rewarding skills you can acquire for your digestive wellness.
Key Takeaways for Successful Fermentation
- Simplicity is Key: You only need two ingredients: cabbage and salt.
- Anaerobic Environment: The cabbage must remain submerged under its own brine to prevent mold.
- Patience Pays Off: Fermentation typically takes 1 to 4 weeks depending on your kitchen's temperature.
- Probiotic Diversity: Homemade sauerkraut offers a wider variety of bacterial strains than most pasteurized store-bought versions.
The Science of Lacto-Fermentation
To understand why sauerkraut is so beneficial, we must look at the process of lacto-fermentation. This isn't just "pickling" in vinegar; it is a biological transformation. When you salt shredded cabbage, you draw out its moisture and create a brine. This salty environment inhibits the growth of pathogenic bacteria while allowing Lactobacillus species—naturally present on the cabbage leaves—to thrive.
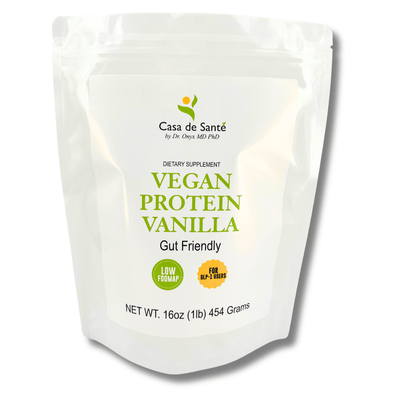
Research published in the journal Foods highlights that Lactobacillus plantarum and Lactobacillus brevis are the primary drivers of this process. These bacteria convert the natural sugars in the cabbage into lactic acid. This acid acts as a natural preservative and gives sauerkraut its signature tang. From a clinical perspective, these live cultures help modulate the immune system and improve the integrity of the gut barrier. For those who need additional support alongside fermented foods, I often recommend the Casa de Sante Synbiotic, which provides a precise blend of probiotics and prebiotics to optimize the microbiome.
Step-by-Step: How to Make Sauerkraut at Home Easy
The beauty of this recipe lies in its minimalism. You do not need expensive crocks or specialized equipment to start. A clean wide-mouth mason jar will suffice.
1. Preparation and Ingredients
You will need one medium head of green cabbage (about 2-3 pounds) and 1.5 to 2 tablespoons of high-quality sea salt. Avoid iodized table salt, as iodine can inhibit the fermentation process. Ensure your hands, knife, and jars are thoroughly cleaned. We aren't aiming for a sterile environment—since we need the natural bacteria on the cabbage—but we want to avoid introducing unwanted pathogens.
2. Shredding and Salting
Discard the outer limp leaves of the cabbage, but save one large, clean outer leaf for later. Core the cabbage and slice it into very thin ribbons. Place the shredded cabbage in a large bowl and sprinkle the salt over it. Now comes the most important part: massage the cabbage. Use your hands to squeeze and bruise the cabbage for about 5 to 10 minutes. You will notice it shrinking and releasing a significant amount of liquid. This liquid is your brine.
3. Packing the Jar
Transfer the cabbage into your glass jar, a handful at a time. Use your fist or a wooden tamper to pack it down tightly. The goal is to eliminate air pockets. Once all the cabbage is in, pour the remaining liquid from the bowl into the jar. The cabbage should be completely submerged under the brine. If you don't have enough liquid, you can mix a teaspoon of salt into a cup of water and add it.
4. The Submersion Trick
Take that large cabbage leaf you saved earlier and fold it to fit inside the jar, placing it on top of the shredded cabbage. This acts as a "buffer" to keep the small bits from floating to the surface. You can also use a glass fermentation weight or even a smaller jelly jar filled with water to weigh everything down. Cover the jar with a lid (tightened loosely to allow gases to escape) or a cloth secured with a rubber band.
Managing the Fermentation Process
Place your jar in a cool spot away from direct sunlight. The ideal temperature is between 65°F and 75°F. During the first few days, you may see bubbles forming—this is a sign that the bacteria are hard at work producing carbon dioxide. This is perfectly normal and a sign of a healthy ferment.
In my clinical experience, I find that many patients with sensitive guts, such as those following a Low FODMAP diet, benefit from starting with very small amounts of sauerkraut—perhaps just a teaspoon a day. While cabbage is a high-FODMAP food in large quantities, the fermentation process can actually reduce some of the fermentable carbohydrates. However, if you find that even fermented vegetables cause bloating, using Casa de Sante Digestive Enzymes can help break down complex fibers and sugars more efficiently.
When is it ready?
Start tasting your sauerkraut after 7 days. If you like a mild crunch and a light tang, it might be ready. If you prefer a softer texture and a deeper "zing," let it ferment for 2 to 3 weeks. Once it reaches your desired flavor profile, move the jar to the refrigerator. The cold temperature will significantly slow down the bacterial activity, allowing you to enjoy your kraut for several months.
Troubleshooting Common Issues
While the process is generally foolproof, beginners often worry about spoilage. Here is what to look for:
- Kahm Yeast: This is a thin, white, filmy layer that can form on the surface. It is harmless but can affect the taste. Simply scrape it off.
- Mold: If you see fuzzy green, black, or pink growth, the batch has been compromised (usually because the cabbage wasn't submerged). If this happens, discard the batch and start over.
- Smell: Sauerkraut should smell sour and sulfurous (like cabbage), but not putrid or like rotting garbage. Trust your nose.
For those looking to deepen their understanding of gut health beyond fermentation, I recommend exploring our guide on probiotics and prebiotics to see how different strains impact your wellness.
Frequently Asked Questions
Is homemade sauerkraut better than store-bought?
Yes, in most cases. Many commercial sauerkrauts found on grocery store shelves are pasteurized. Pasteurization uses heat to kill bacteria, which extends shelf life but also destroys the beneficial probiotics. Homemade sauerkraut is "live" and raw, providing the maximum microbial benefit.
Can I add other vegetables to my sauerkraut?
Absolutely. Once you master the basic technique, you can add shredded carrots, ginger, garlic, or caraway seeds. Just ensure the total salt-to-vegetable ratio remains consistent (roughly 2% salt by weight) to maintain safety.
How much sauerkraut should I eat daily?
I recommend starting slow. Begin with one tablespoon per day to allow your microbiome to adjust to the new influx of bacteria. Gradually work your way up to a small serving with lunch or dinner. Overloading your system too quickly can lead to temporary gas or bloating.
Does sauerkraut help with acid reflux?
While it seems counterintuitive to eat acidic food for reflux, many patients find that the probiotics in fermented foods improve overall digestion, which can reduce the pressure that leads to reflux. However, everyone is unique, and it is best to monitor your individual response.
Is sauerkraut low FODMAP?
Cabbage itself contains sorbitol, a sugar alcohol. However, Monash University testing shows that fermented red and white cabbage can be low FODMAP in small servings (about 1-2 tablespoons). If you are in the elimination phase of the diet, stick to these small portions.
Conclusion
Learning how to make sauerkraut at home easy is a foundational step toward taking control of your digestive health. By harnessing the power of Lactobacillus, you are creating a functional food that supports your immune system, aids digestion, and provides essential vitamins like Vitamin C and K2. Remember that gut health is a journey. While fermented foods are a cornerstone, a holistic approach—including proper supplementation and stress management—is key to long-term vitality.
Disclaimer: The information provided in this article is for educational purposes only and is not intended as medical advice. Always consult with a healthcare professional before making significant changes to your diet, especially if you have underlying health conditions or are pregnant.
",summary: